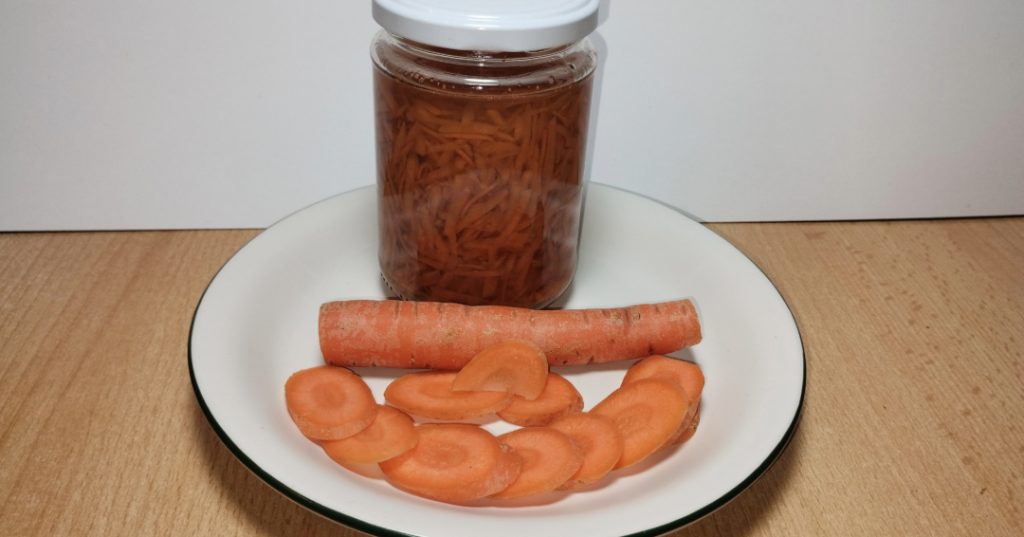
Preserved Carrot Salad

A Sunbeam in a Jar

Preserving carrot salad is a simple and rewarding way to enjoy the taste of fresh carrots throughout the year. This versatile dish involves cooking carrots until tender, combining them with a flavorful marinade, and sealing them in airtight jars. The result is a shelf-stable product that can be stored for months, offering a delightful side dish or a quick and easy snack. Whether you prefer a classic sweet and tangy marinade or a more adventurous blend of spices, preserving carrot salad allows you to customize the flavor to your liking. With a few basic steps and minimal equipment, you can create a pantry staple that captures the essence of summer’s bounty.

Ingredients

  • Carrots (500 grams)
  • Vinegar (500 ml)
  • Apple juice (250 ml)
  • Water (250 ml)
  • Sugar (100 grams)

Instructions

  1. Wash and trim carrots.
  2. Grate carrots.
  3. Prepare marinade: Combine vinegar, apple juice, water, and sugar; bring to a boil.
  4. Fill sterilized jars with grated carrots.
  5. Pour hot marinade over carrots, leaving 2 cm headspace.
  6. Seal jars tightly.
  7. Process in a waterbath canner at 100°C for 120 minutes.

Let the jars stand for about 3 weeks. The preserved carrot salad will last for about 1 year.

Video with instructions:

Posted in Garden, Harvest, Preserving, Recipe | Leave a comment

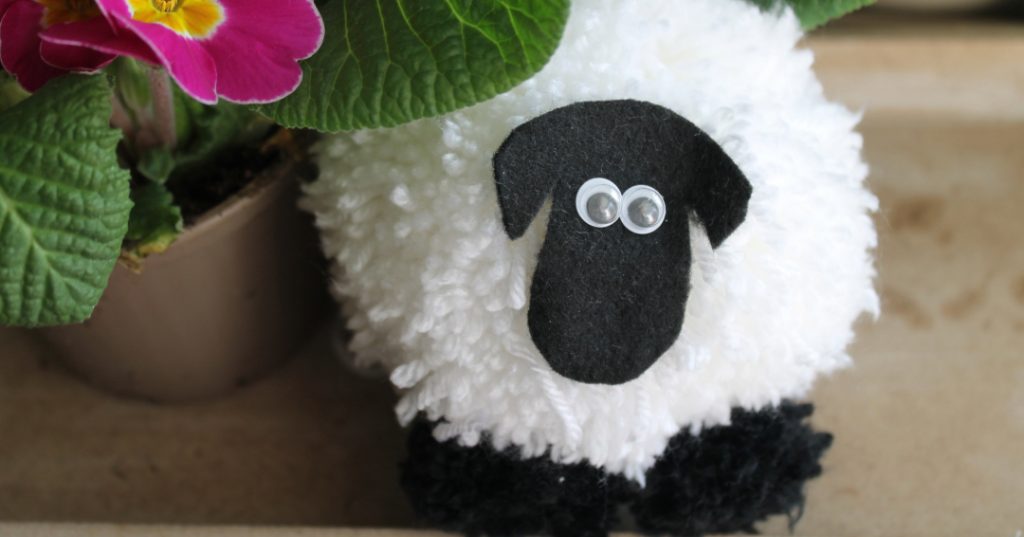
Easter Sheep from Wool – Instructions

Materials:

  • Wool in different colors (white, black)
  • Cardboard
  • Utility knife
  • Fork
  • Glue
  • Felt (black)
  • Googly eyes (optional)

Instructions:

Legs (4 pieces):

  1. Place a thread around the middle tine of the fork.
  2. Wrap the wool around the fork several times until a thick pompom is formed.
  3. Carefully pull out the thread and knot it.
  4. Cut the pompom open on the side with the utility knife.
  5. Slide the pompom off the fork and check the center thread again.

Body:

  1. Cut out two circles from cardboard.
  2. Wrap the wool around the two cardboard rings several times until a thick pompom is formed.
  3. Cut the pompom open at the edge with the utility knife.
  4. Pull the cardboard rings apart and knot a piece of wool between them.
  5. Remove the cardboard rings.

Head:

  1. Cut out the head from felt.
  2. Glue the googly eyes (or draw eyes with a white fineliner) onto the head.

Finishing:

  1. Glue the head on.
  2. Glue the legs to the body of the sheep.
  3. Decorate the sheep to your liking.

Tips:

  • Use different colors of wool to make colorful sheep.
  • You can also use other materials to decorate the sheep, e.g. glitter, feathers or beads.
  • The sheep are perfect as a gift or decoration for Easter.

Have fun crafting!

Download Template:

For detailed instructions, please watch the video:

Posted in Crafting | Leave a comment

Growing Peanuts Indoors: An Exotic Adventure in Your Own Garden

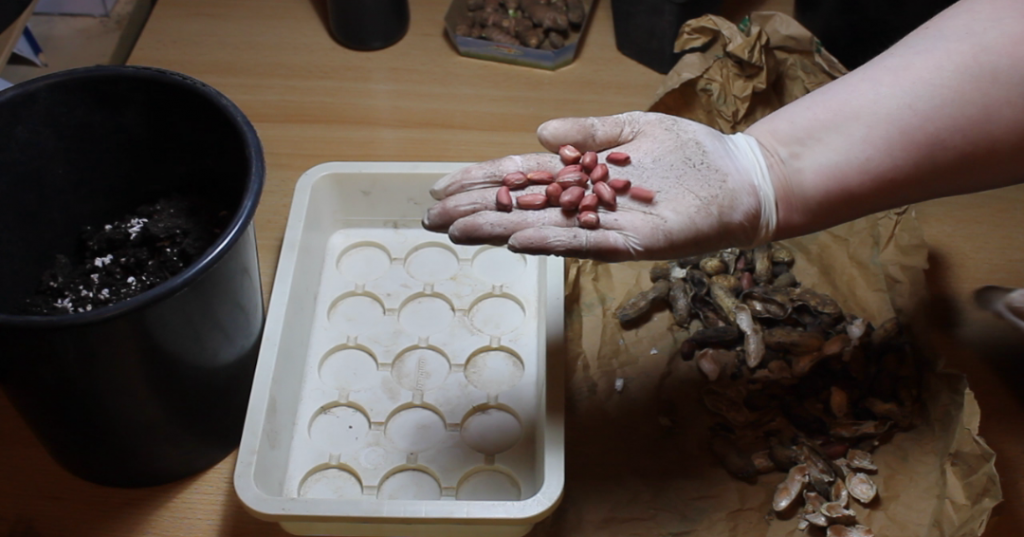
Peanuts, which are commonly referred to as nuts, are botanically legumes. They originated in South America and were cultivated there as early as 7,000 years ago. They were introduced to Europe by the Spaniards in the 16th century and are now popular worldwide.

The growing period for peanuts is up to 180 days, which is a long time compared to other vegetables. Therefore, it is advisable to start the plants indoors in Germany.

Pre-growing:

  • From mid-March to mid-April: Plant seeds about 2 cm deep in potting soil.
  • Warm location (20-25°C) with plenty of light: A sunny windowsill or a greenhouse is ideal.
  • Water regularly: The soil should be kept moist but not wet.
  • Prick out: Once the young plants have two pairs of leaves, prick them out into larger pots.
  • From mid-May: Harden the plants to outdoor temperatures.
  • Planting out: Plant outdoors after the last frost (mid-May to early June).

Health benefits:

Peanuts are high in energy, protein, fiber, and unsaturated fatty acids. They also contain important vitamins and minerals such as vitamin E, magnesium, potassium, and iron.

Tip:

Peanuts need a warm and sunny location with loose, humus-rich soil. The plants should be watered and fertilized regularly.

Conclusion:

With a little patience and proper care, you can also harvest delicious peanuts in your own garden. Pre-growing is recommended as the plants have a long growing period.

The video shows a step by step guide how to pre-grow peanuts:

Posted in Garden | Leave a comment

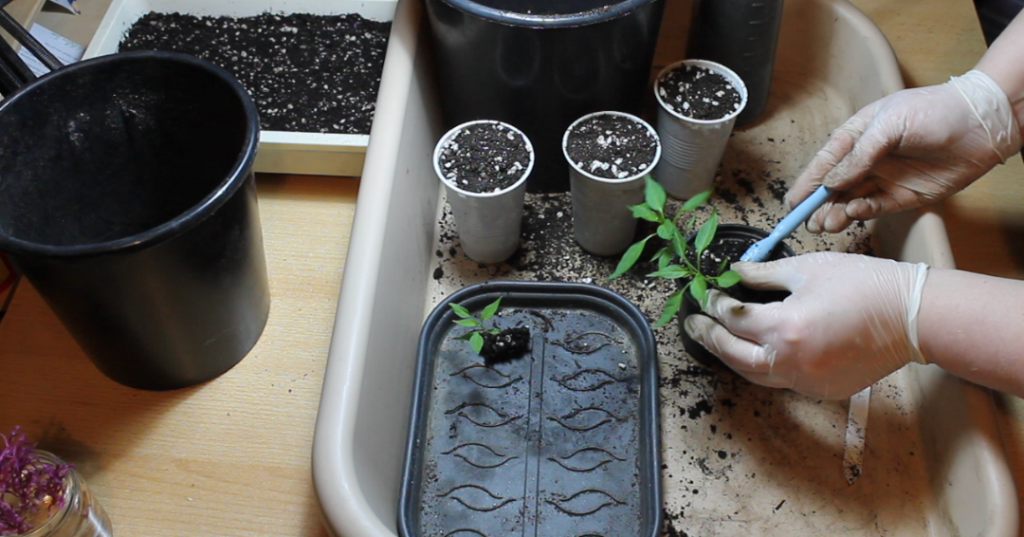
How to Prick Out Paprika and Chili Plants: Boosting the Growth of Your Seedlings

Paprika and chili peppers are popular vegetables that can be grown both in the garden and on the balcony. To achieve an optimal harvest, it is important to prick out the seedlings, i.e. to transplant them into larger pots.

Why prick out?

  • More space: The roots of the seedlings have more space to grow in larger pots.
  • Better nutrient supply: In fresh soil, the plants find more nutrients that they need for their growth.
  • Stronger plants: Pricking out makes the plants bushier and more stable.

When to prick out?

The right time to prick out is when the seedlings are 4-6 weeks old and have 4-6 pairs of leaves.

How to prick out?

Pricking out is easy if you have the right tools and a little patience.

Required materials:

  • Dibber or pricking fork
  • Soil
  • Pots with drainage holes
  • Watering water

Here’s how it works:

  1. Preparation: Moisten the seedling soil and fill it into the pots.
  2. Pricking out: Carefully loosen the seedlings from the soil with the dibber.
  3. Planting: Place the seedlings in the center of the new pots and fill the soil around the roots.
  4. Watering: Water the plants well until the soil is moist.
  5. Location: Place the plants in a bright and warm location.

Further tips:

  • Remove the first flower buds so that the plants can develop better.
  • After pricking out, acclimatize the plants slowly to outdoor conditions before planting them out in the open.

By pricking out, you lay the foundation for healthy and productive paprika and chili plants.

Good luck!

In our video, we show you step by step how to prick out your paprika and chili plants:

Posted in Garten | Leave a comment

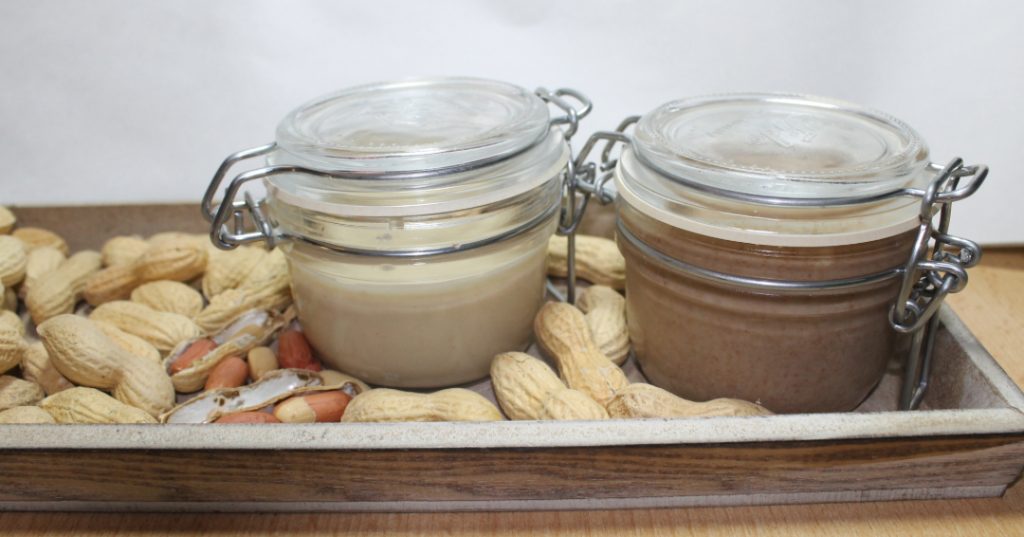
Homemade Peanut Butter: A Delicious and Easy Treat

Peanut butter is a popular spread that is not only delicious but also rich in protein, fiber, and healthy fats. Homemade peanut butter is free of additives and sugar and is therefore a healthy alternative to store-bought varieties.

Ingredients:

  • 500 g peanuts (unsalted and roasted)
  • 1-2 tbsp peanut oil (or canola oil)
  • Optional: 1 pinch of salt, honey, agave syrup, cocoa powder, cinnamon

Instructions:

  1. Finely grind the peanuts in a blender or food processor.
  2. Add the peanut oil and continue mixing until the desired consistency is reached.
  3. Season with salt and optionally refine with honey, agave syrup, cocoa powder or cinnamon.
  4. Pour into a jar and store in the refrigerator.

Uses:

  • Spread for bread
  • Ingredient for smoothies
  • Dip for fruits and vegetables
  • Filling for sandwiches and wraps
  • Ingredient for cakes and cookies

Ingredients:

  • Protein: Peanut butter is a good source of vegetable protein, which is important for muscle building and regeneration.
  • Fiber: Fiber promotes digestion and keeps you feeling full for a long time.
  • Healthy fats: Peanut butter contains unsaturated fatty acids, which are good for the cardiovascular system.
  • Vitamins and minerals: Peanut butter is rich in vitamin E, B vitamins, magnesium and potassium.

Benefits of homemade peanut butter:

  • Free of additives and sugar
  • Healthier than store-bought varieties
  • Versatile
  • Easy to prepare
  • Cheaper than store-bought varieties

Tip:

  • For an extra creamy peanut butter, soak the peanuts for a few hours before grinding.
  • Experiment with different spices and sweeteners to create your own favorite peanut butter.
  • Homemade peanut butter will keep in the refrigerator for about two weeks.

Conclusion:

Homemade peanut butter is a delicious and healthy alternative to store-bought varieties. It is easy to make and versatile. Try it yourself!

The video shows the entire process from peanut harvesting to finished peanut butter:

Posted in Allgemein | Leave a comment

Seed Germination Test: How to Test Seed Viability and Calculate the Germination Rate

Why conduct a seed germination test?

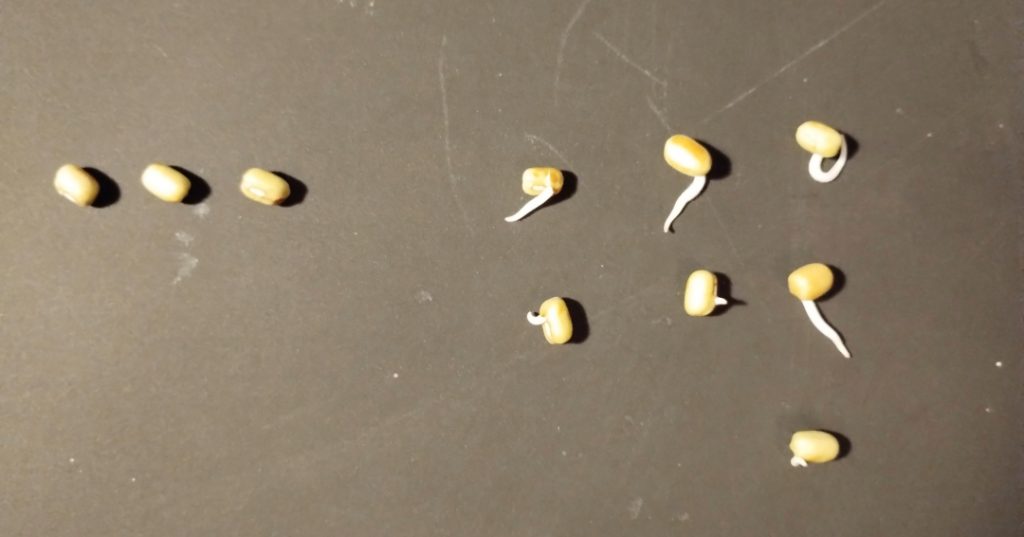
A seed germination test is a simple and reliable way to determine the viability of seeds. This is especially important if you want to use old seeds or if you are unsure whether the seeds are still viable.

Advantages:

  • Less time required: Germination occurs faster than in the field.
  • Cost savings: Avoids failed sowings and unnecessary purchases of new seeds.
  • Better planning: Optimization of sowing quantity and planting time.

Materials:

  • Seeds
  • Paper towels or filter paper
  • Shallow dish or plate
  • Water
  • Cling film or plastic wrap
  • (optional) Thermometer

Instructions:

  1. Moisten the paper towels with water until they are damp but not dripping wet.
  2. Distribute the seeds evenly on the paper towels.
  3. Cover the dish with cling film or plastic wrap to retain moisture.
  4. Place the dish in a warm place with temperatures between 20 and 25 °C (68 – 77 °F).
  5. Keep the seeds moist by re-wetting the paper towels if necessary.
  6. Observe the seeds over a period of 10 to 21 days.
  7. Record the number of germinated seeds.

Calculating the germination rate:

The germination rate can be calculated using the following formula:

Germination rate = (Number of germinated seeds / Number of total seeds) x 100

Example:

Assuming you have planted 20 seeds and 15 of them have germinated. The germination rate is then:

Germination rate = (15 / 20) x 100 = 75 %

Seed germination rateSeeds per planting hole
0-24at least 5 seeds
25-49at least 4 seeds
50-74at least 3 seeds
75-100at least 2 seeds
Seed germination rate and recommended seed count per planting hole

Interpreting the results:

  • Germination rate > 80 %: The seeds are highly viable and can be used without hesitation.
  • Germination rate 50 – 80 %: The seeds are still sufficiently viable, but slightly more should be sown.
  • Germination rate < 50 %: The seeds are no longer highly viable and should not be used.

Tips:

  • Conduct the seed germination test separately for each seed variety.
  • Use multiple Petri dishes for each seed variety to obtain more accurate results.
  • Make sure the seeds do not dry out during germination.
  • Record the germination time of each seed.
  • Use low-germinating seeds only if you want to sow them directly in the field.

Conclusion:

Conducting a seed germination test is a simple and effective way to determine the viability of seeds. This way you can ensure that your sowing is successful and you achieve a good harvest.

In the video you will see how to perform a germination test und you find further calculating examples:

Posted in Garden | Leave a comment

Ghee / Clarified Butter: Homemade Nutty Gold from the Kitchen

Clarified butter, also known as ghee, is a type of clarified butterfat that can be used in a variety of ways in the kitchen. It is free of lactose and milk sugar, making it suitable for people with intolerances. Making clarified butter is incredibly simple and requires little effort.

Ghee in Ayurveda

In Ayurveda, the traditional Indian system of medicine, ghee is highly valued. It is considered one of the most important sattvic foods, which are foods that promote purity, clarity, and lightness.

Ayurvedic ghee is made using a special process that is said to enhance the positive properties of clarified butter. For example, ghee is often made during a full moon and purified with mantras.

In Ayurveda, ghee is used both internally and externally. When taken internally, it is said to improve digestion, stimulate agni (the digestive fire), and strengthen the immune system. When applied externally, it is said to nourish the skin and prevent hair loss.

Ingredients:

  • Butter

Equipment:

  • Saucepan
  • Strainer
  • A layer of kitchen paper as a filter
  • Glass jar

Instructions:

  1. Slowly melt the butter in a saucepan over low heat.
  2. Once the butter is completely melted, increase the heat slightly and simmer the butter. A white foam will form on the surface, which should be skimmed off.
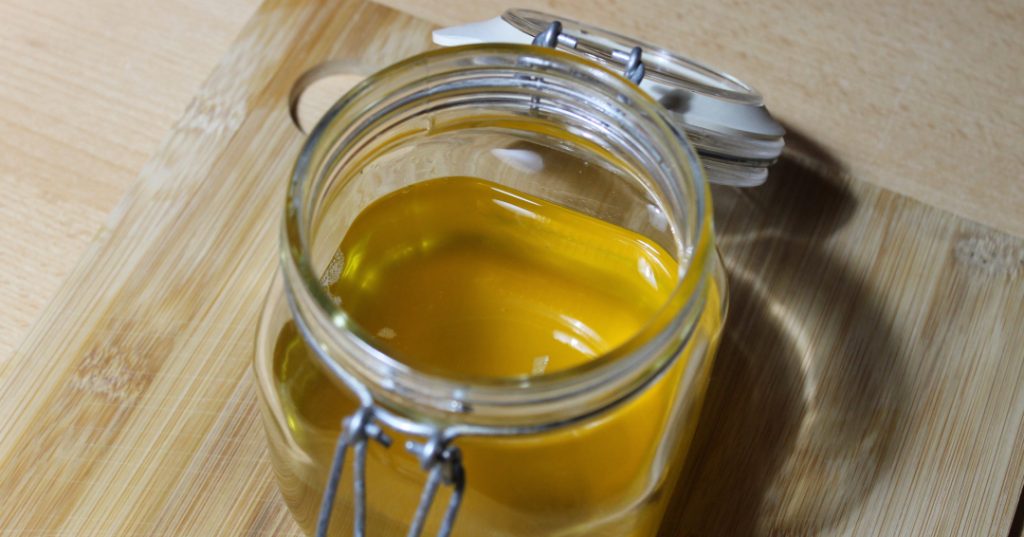
  3. Pour the clarified butter through a strainer lined with a filter into a glass jar.
  4. Let the clarified butter cool completely and solidify.

Storage:

Clarified butter can be stored at room temperature.

Benefits:

  • Clarified butter is free of lactose and milk sugar.
  • Clarified butter has a high smoke point, making it ideal for frying and sauteing.
  • Clarified butter has a nutty aroma and gives dishes a special flavor.

Uses:

Clarified butter can be used for frying, sauteing, baking, and stewing. It is also excellent for finishing sauces, soups, and curries.

Tip:

Clarified butter can be flavored with spices and herbs.

Conclusion:

Clarified butter is a versatile and delicious fat that can be easily made at home. It is a good alternative to butter and other oils and is suitable for a variety of cooking methods.

Video:

The video shows step-by-step how to make clarified butter yourself:

Posted in Allgemein | Leave a comment

Homemade Grow Box for Seedlings

Speed Up the Seedling Phase and Start Independent of the Season

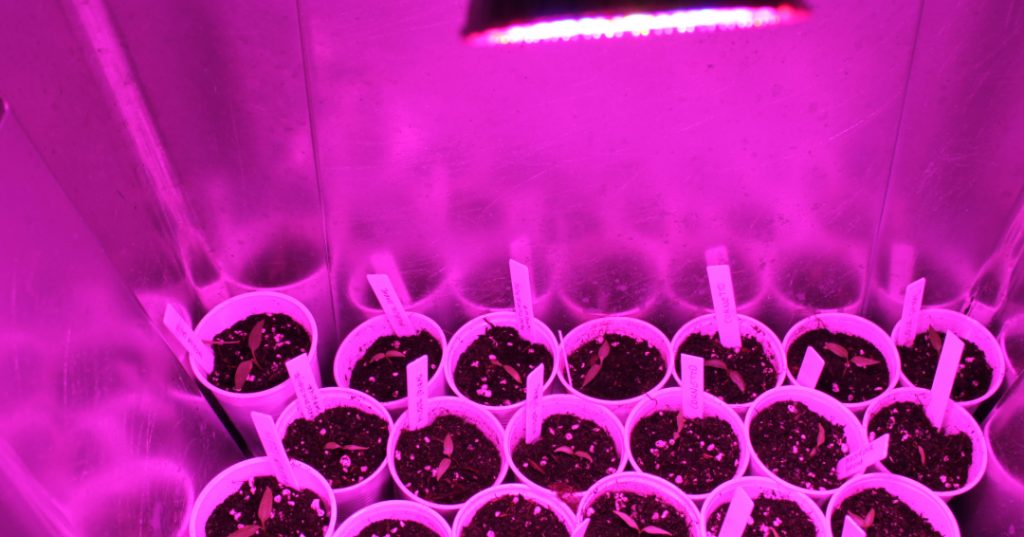
A grow box offers optimal conditions for plant cultivation, regardless of weather and sunlight hours. With the integrated plant lamp, the start of the seedling phase can be significantly accelerated before the natural light intensity in spring is sufficient.

Advantages:

  • Earlier start: Independence from the season and sunlight hours.
  • Controlled light supply: Optimal lighting for healthy growth.
  • Faster development: Plants grow faster under ideal conditions.
  • Higher yields: Increase in plant production through early cultivation.
  • No dirt: In apartments, the box is a good option for clean pre-cultivation.

Building Your Own Grow Box: It’s That Easy

A grow box offers many advantages and can be built cost-effectively yourself. Another indirect advantage of the box is that it functions like a small greenhouse. The materials to build a box are available at hardware stores or furniture stores, as well as online.

Material List:

  • Plastic box with lid
  • Lamp socket
  • Plant lamp
  • Primer (spray or apply)
  • Spray paint (silver)
  • Drill
  • Step drill
  • Plastic drill
  • Sandpaper
  • Methylated spirits
  • Cloth
  • Pen
  • Gloves
  • Optional: paintbrush, for applying primer

Instructions:

  1. Mark the position for the lamp socket on the lid.
  2. Pre-drill with a plastic drill in the center of the marking and then enlarge the opening with a step drill.
  3. Drill a total of 32 air holes around the perimeter, slightly away from the top and bottom edges.
  4. Use sandpaper to clean all drill edges and also sand the inside of the box and lid that will later be painted or varnished for better adhesion.
  5. Rinse off the sanding dust and dry the surfaces.
  6. Clean everything with methylated spirits.
  7. Apply the primer and let it dry.
  8. Apply spray paint and let it dry.
  9. Install the lamp socket and screw the plant lamp into the socket.

Tip: One box is often not enough. Over the years, we have established a total of eight boxes for the cultivation of young plants.

The video shows step by step how the grow box is made:

Posted in Garden | Leave a comment

The best tart with Swiss chard in the world

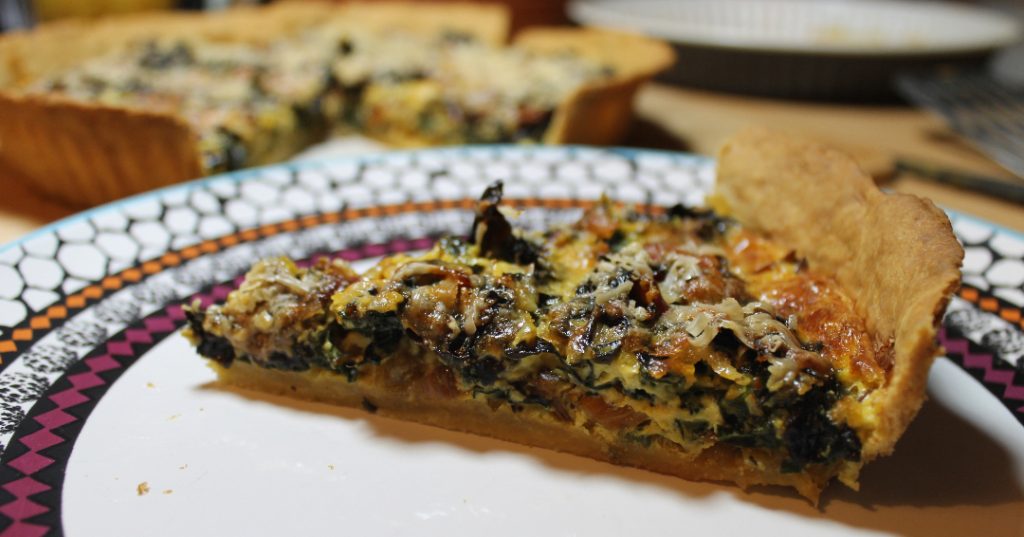
The tart, a delightful French treat, captivates with its crispy crust and diverse fillings. Whether sweet with fresh fruit or savory with vegetables, the tart seduces taste buds with its perfect blend of flavors. A delight that is irresistible in every variation. This time, the tart is filled with chard.

Chard, a leafy vegetable from the beet family, impresses not only with its delicious taste but also with numerous health benefits. Rich in vitamins, minerals, and antioxidants, chard supports immune function, promotes bone health, and has anti-inflammatory properties. Its high fiber content contributes to digestive health. The versatile use in the kitchen makes chard a valuable addition to a balanced diet.

Ingredients

Dough:

  • 170 g flour
  • 60 g cold butter
  • 1 egg
  • salt
  • water

Filling:

  • Swiss chard
  • oil/fat
  • 3 garlic cloves
  • salt
  • Herbes de Provence
  • 3 eggs
  • 120 ml cream
  • 120 ml milk
  • salt
  • nutmeg
  • grated Parmesan

Preparation

Combine flour, cold butter, egg, and salt. Add some water for better binding. Knead everything into a smooth dough and refrigerate covered for about 30 minutes.

Meanwhile, chop the chard and sauté in a pan with some oil or fat. Sauté the stems first, followed by the leaves, as the stems have a longer cooking time. Chop or press 3 garlic cloves and add. Season with salt and Herbes de Provence.

Place the dough into the tart pan, prick it with a fork, and pre-bake for 10 minutes at 200°C (392°F) top/bottom heat.

In the meantime, mix eggs, cream, milk, a pinch of salt, and nutmeg in a bowl.

Take out the pre-baked crust, evenly distribute the chard, and pour over the egg mixture. Finally, sprinkle with Parmesan.

Finish baking at 200°C (392°F) top/bottom heat for about 20 – 25 minutes.

Watch the step-by-step preparation in the video here.

Posted in Allgemein | Leave a comment

Harvesting and freezing Swiss chard

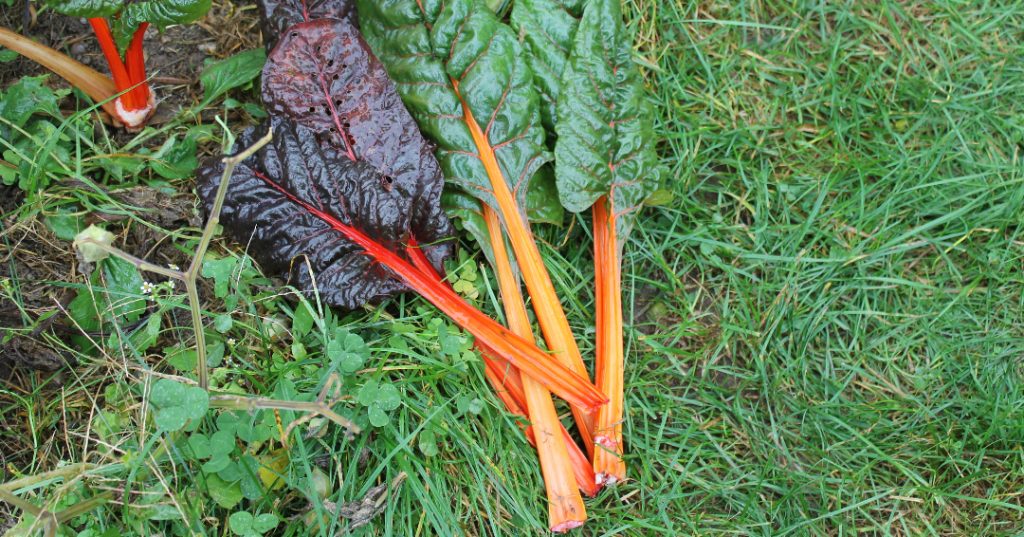
Geernteter Mangold
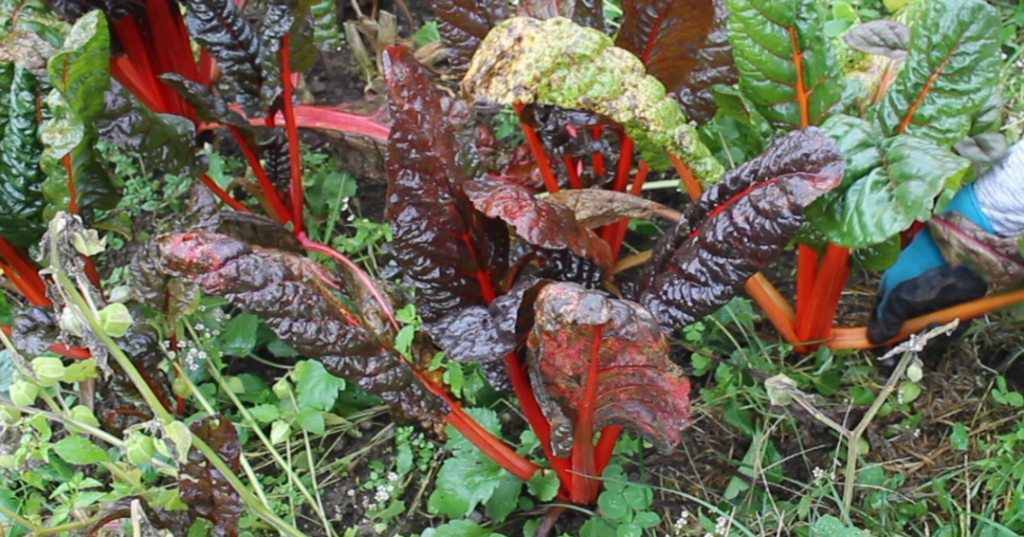
Mangold

Harvesting Swiss chard requires a mindful approach that goes beyond simple picking. It’s crucial not to cut the leaves but gently tear them off. This process not only preserves the plant but also contributes to its long-term health. Cutting may lead to decaying stem remnants, consuming unnecessary resources and hindering growth.

Gentle tearing prevents decaying residues, averting potential diseases and pests. A healthy stem base can continue transporting nutrients, enabling roots to function optimally. This harvesting method is not only sustainable but also helps maintain the quality of the harvest.

It is important to emphasize that this practice not only influences the current harvest but also the future of the plant. Regular, respectful handling of Swiss chard contributes to maintaining the health and productivity of the plant over multiple growth cycles.

By consciously tearing off the Swiss chard leaves, a continuous source of fresh, healthy leaves for culinary purposes is opened up. This method ensures that the harvest is not only flavorful but also aligns with the ecological needs of the plant, promoting sustainable and effective cultivation.

Freezing Swiss chard

Freezing Swiss chard is an excellent way to preserve the freshness of this healthy leafy green. A notable advantage of freezing Swiss chard is that, unlike many other vegetables, it does not require blanching. This significantly simplifies the process and preserves the majority of nutrients and natural flavor.

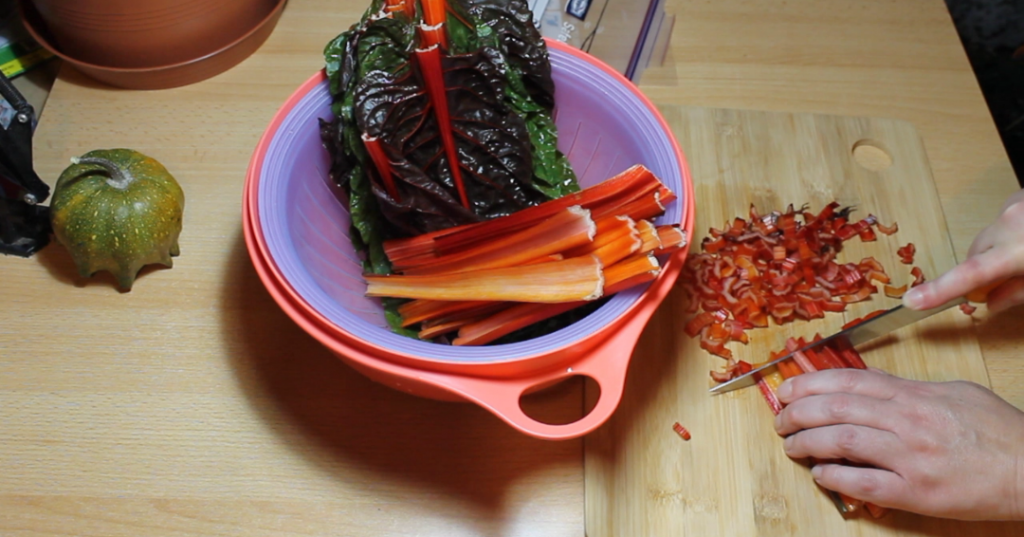
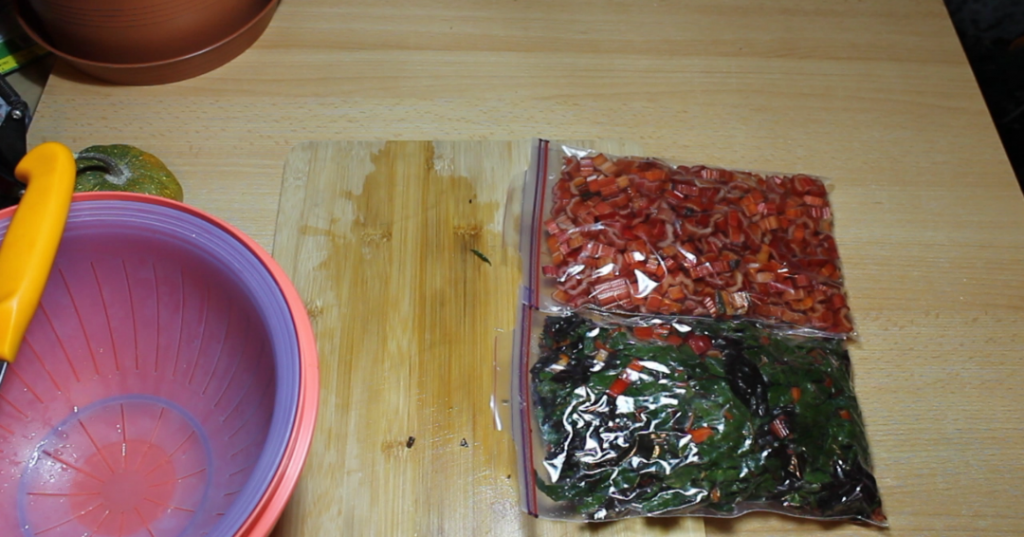
It is advisable to freeze stems and leaves separately since they have different cooking times. Stems may take a bit longer to achieve the desired consistency, while leaves cook more quickly. This approach allows for more flexibility in using the ingredients in various dishes.

To prepare Swiss chard for freezing, the leaves should be separated from the stems and thoroughly washed. Subsequently, you can divide the leaves and stems into suitable portions and freeze them in airtight containers or freezer bags. This not only facilitates storage but also allows you to take out only the desired amount for a meal without having to thaw the entire supply.

Freezing Swiss chard is a practical method to enjoy this versatile vegetable throughout the year. It’s crucial to ensure that storage containers are well sealed to preserve the aroma and freshness of Swiss chard for at least six months. With this simple method, you can continue to savor the benefits of Swiss chard in various dishes, whether in soups, stir-fries, or as a side to different meals.

Watch the video on how to harvest and prepare Swiss chard for freezing here:

Posted in Allgemein | Leave a comment